Best Overall

ANRABESS Smocked-waist lounge palazzo pants
Explicit smocked-waist example for comparing visible and covered waistband styling.
Panel depth and room for a tuck are unverified.
View on AmazonStyle
You tuck in a shirt, smooth the front, sit down—and a lump appears beside the pocket. The problem is often the amount and placement of fabric inside the waistband, not the size of your body or the width of the pants. Palazzo trousers give you room through the leg, but the waistband still has a limited amount of space.
A good tuck is comfortable, reasonably stable and suited to the top's construction. It can reveal the whole waistband, just a small front section, or none at all. Use the techniques below as experiments, then keep the one that survives ordinary movement without needing constant attention.
As an Amazon Associate I earn from qualifying purchases. Purchases take place on Amazon.
Best Overall
Explicit smocked-waist example for comparing visible and covered waistband styling.
Panel depth and room for a tuck are unverified.
View on AmazonBest Budget
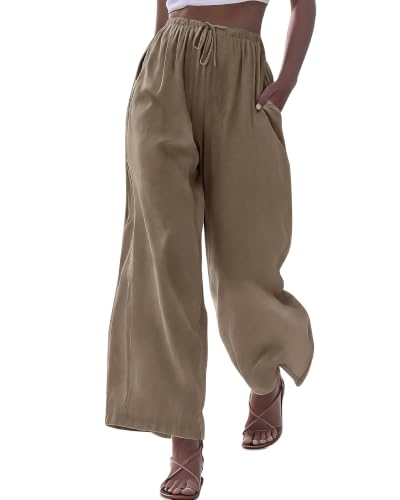
Drawstring palazzo example for practicing a small front tuck around the fastening.
The title does not establish waistband dimensions.
View on AmazonBest Premium
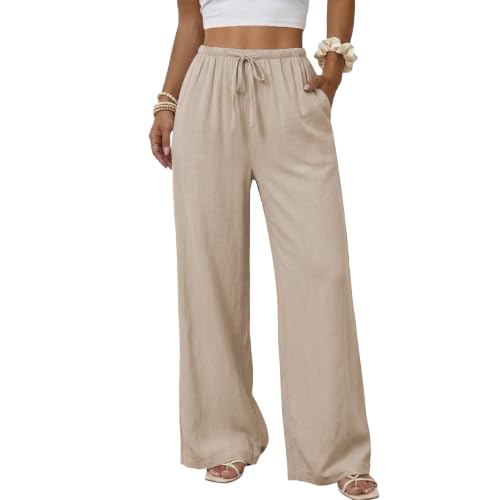
Higher-priced drawstring elastic-waist option for an alternate tuck arrangement.
Price does not show that it accommodates more shirt fabric.
View on AmazonThese are editorial shopping starting points based on listed details, not hands-on tests. Budget and Premium describe relative asking-price tiers among the featured options when researched; they do not establish product quality. Confirm the selected size, composition and current price on Amazon. How we choose examples.
A fixed waistband with a zip or button gives you an opening through which to arrange the shirt. An elastic waistband may allow you to pull fabric in from above, but it also needs room to stretch comfortably. A smocked panel spreads its gathers over a deeper area. A drawstring introduces another detail that can sit beneath or above the tucked fabric.
Fasten the pants without the top tucked in first. If they already feel restrictive, adding shirt tails is unlikely to help. Conversely, if the waistband is loose, a tuck should not become the main device holding the pants up. Deal with the pants' fit separately, using the fit guide if needed, before judging the styling technique.
The finished result need not be skin-tight. A little ease above the waistband helps the shirt move with you. How much you release depends on the shirt's length and the appearance you prefer. Pulling out too much can cause it to escape entirely; forcing it too flat can make ordinary reaching uncomfortable.
A long shirt has more material to manage than a short blouse. Instead of rolling its hem into a thick rope, let the tails lie as flat as the available space allows. Check the side seams and pocket openings, where hidden folds often become visible. If a front panel has several buttons, avoid stacking a button directly beneath the waistband's own closure.
Look at the pants from the side as well as the front. A neat front view can conceal a concentrated bundle at the back. If you cannot distribute the material comfortably, choose a partial tuck or leave the shirt out. This is an incompatibility between garment lengths and waistband space, not evidence that you need to size down the top.
Start with an untucked top. Take a modest section at the center front and insert it just far enough to remain in place. Let the fabric on either side form a natural transition into the untucked hem. Step back and look at whether the sides fall freely or are being dragged toward the middle.
If the tuck creates a large pouch, reduce the amount of fabric inserted or choose a different top. A front tuck often works more easily with a supple tee or shirt than with a stiff, very long tunic, though the actual garments decide. You can offset the tuck slightly if that suits the top's drape. It does not have to sit directly over the trouser closure.
With a button-front shirt, you can tuck one front panel and leave the other outside. Unfasten only the lower buttons needed to separate the panels comfortably, keeping the rest of the shirt secure. Insert one side, arrange the tail inside the pants and allow the other side to fall without being pulled across the front.
Check the resulting opening when seated. The shirt should not expose more than you intend or twist at the buttons. If the asymmetry looks accidental to you, make the tuck smaller, open the shirt over an inner top, or use a full tuck. A half tuck is a casual styling option, not a compulsory technique for every button-front shirt.
| Top and waistband combination | First technique to try | Reason to switch |
|---|---|---|
| Fine shirt with a roomy fixed waistband | Full tuck with distributed tails | Buttons or seams create concentrated bulk |
| Soft tee with elastic waist | Small front tuck | Elastic pulls the tee into a pouch |
| Long button-front shirt | One-sided tuck or open layer | Panel twists when seated |
| Thick sweater with a snug waist | No tuck | Try a shorter sweater if the hem feels crowded |
| Blouse with decorative bottom edge | Untucked | Decoration catches or ends at an awkward overlap |
| Top with a tie near the hem | One visible fastening detail | Top tie and trouser drawstring compete |
The table describes starting experiments. Fabric thickness, garment length and the pants' actual fit matter more than whether a retailer calls the top a blouse, knit or tee. Keep the technique that works after you move, not just the one that looks tidy for a photograph.
With elastic, spread fabric around the waistband rather than pushing a large amount into the front. Check that the waistband still expands comfortably when you sit. If it rolls or folds with the top inside, remove the tuck and see whether the issue remains. That separates the waistband's own behavior from the extra bulk introduced by the shirt.
A smocked panel can be an intentional visible feature. Let the top meet its upper edge or tuck it smoothly behind the panel if there is room. With a drawstring, decide whether you want the tie visible. Keep its knot accessible instead of burying it beneath thick shirt folds. Avoid trapping long tie ends in a tuck that makes routine adjustment unnecessarily difficult.
Try leaving a substantial sweater outside the pants before searching for ways to hide all of it. Look at where its hem ends. A sweater that finishes near the upper hip can overlap a waistband without requiring any inserted fabric. A longer sweater creates a more relaxed silhouette. Either can work if you like the coverage and can access the pockets comfortably.
Folding the sweater hem inward can shorten its appearance temporarily, but it may create a visible ridge or slip during wear. Treat that as a mirror experiment, not a guaranteed all-day fix. Avoid improvised tight bands or fastenings that dig in, damage the knit or require continual adjustment. Choosing a different sweater length is often the most straightforward solution.
An untucked top needs a considered relationship with the pants, not an exposed waistband. Look at the top's shape, side slits and bottom edge. A straight hem produces a different line from a curved shirt tail. A loose top over flowing trousers creates a generous outfit; a neat boxy top creates a shorter overlap. Neither requires a belt to justify it.
Use the rest of the outfit to support that choice. A defined jacket can frame a loose untucked blouse. A simple necklace can draw attention to the neckline. For jacket-specific length decisions, visit jackets and blazers with palazzo pants. You do not have to solve every proportion question by pulling the top into the waistband.
The catalog title for ANRABESS high smocked-waist palazzo pants explicitly names the smocking. That gives you a reason to consider whether your top should reveal or overlap the panel. The title does not provide its depth or stretch range, so those details still need checking before you plan a full tuck.
Duyang cotton-linen palazzo pants with a drawstring elastic waist present a different styling question: where should the shirt end relative to the tie? A small off-center tuck or an untucked shorter top may leave the fastening accessible. Fiber proportions and exact waistband construction are not established by the title alone; do not assume the two examples have equal room for shirt tails.
If a shirt's lower section has deep folds from storage, smoothing it according to its care instructions can make it easier to arrange. Do not automatically iron every fabric at the same setting. GINETEX's labeling principles explain that permitted care reflects the complete garment. Follow the actual top's label, including restrictions created by trims or finishes.
After dressing, use your hands to distribute fabric rather than trying to press a crease into the top while wearing it. A tuck should remain a reversible styling choice. If it only works after elaborate fixing, consider a simpler arrangement that you can recreate after using the restroom or changing layers during the day.
Reach for a shelf, sit in a chair, bend your elbows and walk. Look at what changed. A little movement above the waistband is normal; the issue is whether the top escapes completely, bunches uncomfortably or needs repeated correction. Adjust one thing—the depth of the tuck, the amount of fabric or the method—and try again.
Keep a quick outfit note if you find a reliable pairing. Record the exact top and pants, because a longer version of a similar shirt may behave differently. Your best technique is the one that feels comfortable and easy to restore, whether it is a full tuck, a small front tuck, a relaxed half tuck or no tuck at all.
Do not choose a different trouser size solely to store excess shirt fabric. First confirm that the pants fit comfortably on their own, then test the top inside. A shorter or less bulky top, partial tuck or untucked arrangement may solve the problem without compromising waistband fit.
Yes, if there is comfortable room and the fabric lies smoothly behind the panel. Insert small amounts, distribute them and sit down to check the result. If the panel rolls or the top bunches, compare an untucked version or a shallower front tuck.
Too much fabric may be gathered into a small section, or the top may be too long or stiff for that method. Reduce the inserted width and depth, let the sides fall freely, and compare a full tuck or no tuck. The answer is garment arrangement rather than tightening the waistband.
Treat tucking as a way to arrange fabric, not a requirement for wearing palazzo pants. Start with a comfortable waistband, choose a method that suits the top's length and thickness, and leave enough ease to sit and reach. Full tucks benefit from even distribution; front tucks need a light hand; half tucks depend on a shirt panel that falls freely. Thick knitwear and decorative hems may be better outside the pants. Keep the version that remains comfortable through ordinary movement and is easy to restore. A visible waistband is one possible outcome, not the standard every outfit must meet.