Best Overall
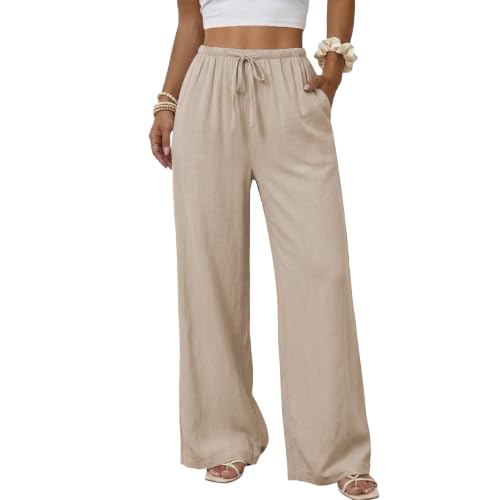
Duyang Cotton-linen drawstring palazzo pants
An optional ready-made reference for an elastic and drawstring palazzo waist.
Not a pattern or evidence of internal construction.
View on AmazonSewing
Your first pair of palazzo pants is easier to manage when you define one construction before cutting. This walkthrough follows a simple, unlined, full-length woven design with two front pieces, two back pieces, a folded elastic casing, and optional patch pockets. Use a purchased or otherwise properly drafted pattern with that construction; the steps below explain the workflow, not a printable pattern or universal seam allowance.
As an Amazon Associate I earn from qualifying purchases. Purchases take place on Amazon.
Best Overall
An optional ready-made reference for an elastic and drawstring palazzo waist.
Not a pattern or evidence of internal construction.
View on AmazonBest Budget

A lower-priced pleated drawstring example for contrasting design features.
Pleats add a different construction decision; the listing supplies no sewing instructions.
View on AmazonBest Premium

A higher-priced printed linen-palazzo example to compare with a planned finished garment.
Price tier does not establish workmanship or a reproducible pattern.
View on AmazonThese are editorial shopping starting points based on listed details, not hands-on tests. Budget and Premium describe relative asking-price tiers among the featured options when researched; they do not establish product quality. Confirm the selected size, composition and current price on Amazon. How we choose examples.
The project here has no zipper, lining, fly, permanent pleats, or attached separate waistband. Each leg is formed from a front and back, so there are four principal fabric pieces. The upper edge includes enough allowance to fold into the elastic casing. Optional patch pockets are applied to the outside of the pants while those pieces are still accessible. If your pattern has different construction, use its sequence rather than forcing it into this one.
A beginner label alone does not establish the silhouette. For example, Seamwork's Joss pattern combines elastic, wide legs, and patch pockets, but the designer describes it as ankle-cropped. It illustrates approachable features, not an automatic full-length palazzo result. Settle your pattern choice with the pattern selection guide before beginning this construction walkthrough.
Read the complete instructions, including the cutting layout and any glossary. For a printed PDF, check the supplied scale square before assembling the sheets. Confirm whether seam allowances are included, how many of each piece are required, and which size lines you are following. Mark the front and back clearly; they can look similar when spread across a table but are not usually interchangeable.
Compare your measurements with the designer's body and finished-garment charts. Make the intended length adjustment on paper, and test an unfamiliar fit in suitable inexpensive fabric before cutting a treasured length. Elastic can control the waist opening, but it does not repair inadequate hip room or an unsuitable crotch shape. Resolve the large fit decisions now so the final construction is a sequence of manageable operations.
Prepare the fabric according to its supplier's advice and intended permitted care, then allow it to dry and settle before cutting. Press only as the fabric permits. You need the chosen pattern, compatible fabric and thread, the specified elastic, a suitable machine needle, scissors or a rotary cutting setup, measuring tools, marking tools, pins or clips, and a way to thread the casing. A serger is optional if your machine can make an appropriate alternative edge finish.
Use scraps to test a normal seam, edge finish, and pressing method. Check both faces: puckering, skipped stitches, a stretched edge, or thread that breaks under ordinary handling needs attention before the garment is assembled. Change one relevant setting or component at a time, following the machine manual. Keep the successful sample nearby; it is a useful reference when the larger pieces make a seam harder to inspect.
Spread the fabric without stretching it. Align each pattern grainline parallel to the selvedge by measuring from both ends of the printed line. Maintain any required one-way direction for a print or surface. A folded layout usually creates mirrored pairs when cut correctly; a single-layer layout requires deliberately flipping the paper piece where the pattern instructs. Two identical fronts facing the same way will not make a normal left and right leg.
Before cutting, count the pieces and check that casing and hem allowances remain attached to the paper shapes. Transfer notches, pocket positions, fold lines, and the front/back identification using a method tested on a scrap. Keep marks within allowances where practical. Cut steadily along the correct size line, without lifting large unsupported sections of fabric. If you still need to calculate the purchase length, pause for the yardage calculation guide rather than squeezing essential pieces into an inadequate layout.
Follow the pattern's pocket template and fold allowances. Finish the upper opening first, then prepare the remaining edges as directed. Compare the two pockets before attaching them: their shape, opening height, and placement should reflect the intended design. Mark their locations on the correct panels, and keep the opening unstitched when sewing around the pocket sides and bottom.
A pocket that appears level on a loose panel may look different on the body, so use the fitting sample to approve placement if access matters. Do not move a pocket into the future side seam or casing allowance inadvertently. Reinforce its opening as the pattern directs. If you omit an optional pocket, remove its visible marks and continue; do not omit a pocket piece that is structurally part of a different pocket construction.
Place one front and its corresponding back right sides together. Match the relevant notches and stitch the outer leg seam using the pattern allowance. Join that pair along the inner leg seam as well. Repeat with the other front and back. You should now have two leg tubes, each with a front, back, and an unsewn upper crotch curve.
Press and finish the allowances at the stage your chosen method requires. A finish that encloses the raw edges can require different preparation from a plain seam with zigzagged allowances, so decide before starting. Avoid stretching a curved or bias portion while feeding it through the machine. When a seam crosses a previously finished edge, check that the intersection is secure and that no pocket or loose fabric has been caught accidentally.
Turn one leg right side out and leave the other wrong side out. Place the first inside the second so their right sides face each other. Align the front crotch edges, back crotch edges, notches, and inseam intersection. Trace the intended U-shaped seam with your finger before stitching; this simple check helps reveal a twisted leg or mismatched front and back.
Sew the continuous crotch seam according to the pattern, using its specified reinforcement and finishing approach where given. Do not trim aggressively into the curve just to make the allowances look smaller. Remove the inner leg and inspect the pants right side out. Both legs should hang independently, with the front at the front and the pocket openings accessible. At this point you have the basic garment, but its final fit still depends on the waistband position.
Temporarily establish the waist at its intended height, using a safe basted fitting arrangement that approximates the finished casing and elastic. The pants must pass over the hips before the elastic settles at the waist. Sit and walk as well as standing. Check whether the crotch pulls, the back waist drops, or the side seams twist. Some folds are simply the extra fabric that makes a pull-on design possible.
Correct a construction mistake before treating it as a body-fit problem. Verify matched notches, front/back orientation, and consistent seam allowances first. If a genuine fit adjustment is needed, preserve the seam allowances until it is resolved. This is the last convenient stage for many upper-seam changes. The separate waistband alteration guide discusses an existing garment; a first sewing project benefits from settling the fit before the casing is permanent.
Fold the upper allowance along the pattern's marked lines, enclosing or finishing the raw edge as instructed. Make sure the casing will accommodate the specified elastic without a tight channel. Stitch it while leaving the required access opening. Keep the casing depth consistent around the circumference so the elastic does not meet an unexpected narrow section.
Attach a threading aid securely to one elastic end and retain the other end outside the opening. Feed it around gradually, checking that the strip remains flat. Join the ends using the elastic and pattern instructions, then test the waist before closing the access gap. Tilly and the Buttons' waistband tutorial is a useful visual reference for handling a casing and elastic; its measurements belong to its own pattern. Distribute the gathers, complete the opening, and add any specified anti-twist securing stitches.
| What you notice | First construction check | Next decision |
|---|---|---|
| One leg spirals | Matched pieces, grain direction, and seam alignment | Correct assembly before changing the leg shape |
| Elastic bunches inside the waist | Twisting, channel width, and join bulk | Reopen the access gap if needed |
| Pants will not pass over the hips | Unstretched fabric opening and seam allowances | Reassess pattern ease; longer elastic alone may not solve it |
| Hem appears uneven | Waist position, panel orientation, and how the fabric settles | Set the final length on the body |
Try the pants with the shoes you intend to wear. Mark the finished length around each leg without assuming the two raw edges need identical trimming. Allow a fabric that requires settling to do so before this measurement. Then finish the hem with the pattern's method or an appropriate sewn hem. Remove temporary stitches and markings, inspect the pockets and casing, and give the garment its permitted final press.
The Duyang cotton-linen palazzo listing with drawstring and elastic waist offers a ready-made reference for a relaxed waist treatment. The Made By Johnny pleated drawstring palazzo listing introduces pleats as a different design feature. Those titles are enough to distinguish the advertised concepts, but they do not provide a sewing pattern, internal construction diagram, or verified fabric percentages.
A higher-priced Lands' End linen high-rise palazzo listing in a floral print is another optional finished-garment comparison. Buying any of these is unnecessary for the project. Keep your first construction simple, record the adjustments you actually made, and save a small labeled fabric sample. The next pair will be easier to plan when you can distinguish the pattern's instructions from the choices that worked for your own version.
Yes, if your sewing machine and chosen seam finish are suitable for the fabric. Test an appropriate edge finish on scraps and use the pattern instructions; a serger is not required for this basic construction.
Their shapes provide different room around the body. In this four-piece design, each front joins its corresponding back to form a leg. Do not substitute one for the other because the outlines look similar.
You can accept that risk, but an unfamiliar pattern and precious fabric are a poor combination for a first attempt. A sample lets you check hip passage, rise, and length before committing to the final cloth.
A zipper changes the opening, allowances, and construction order. Choose instructions designed for that closure instead of treating it as a small finishing addition to this elastic-casing project.
A successful first pair starts with a clearly defined pattern and ends with a garment that works in motion. Keep this version to four main woven pieces, a folded elastic casing, and optional patch pockets. Check the paper scale and allowances, cut mirrored pairs on grain, and finish each construction stage before the next makes access difficult. Test the upper fit before closing the waistband, and test the elastic before sealing its opening. Hem only after the waist and leg hang are settled. Your most useful record is a short account of the actual fit changes, seam settings, and length that made this particular pair work.