Best Overall

TARSE Linen office palazzo trousers
An optional pleated palazzo example for identifying details that need pattern pieces.
A finished garment title cannot establish fabric consumption.
View on AmazonSewing
The fabric needed for palazzo pants is a layout problem, not a fixed number of yards. Two people sewing the same size can need different lengths because one chooses a narrow directional print and the other uses a wider solid. Begin with the selected pattern's chart, then verify the changes that apply to your fabric and version. A real layout is more dependable than multiplying your leg length by a universal rule.
As an Amazon Associate I earn from qualifying purchases. Purchases take place on Amazon.
Best Overall
An optional pleated palazzo example for identifying details that need pattern pieces.
A finished garment title cannot establish fabric consumption.
View on AmazonBest Budget
A lower-priced flowing palazzo reference when comparing a simpler advertised silhouette.
No cutting layout, fabric width, or sewing specifications are supplied.
View on AmazonBest Premium

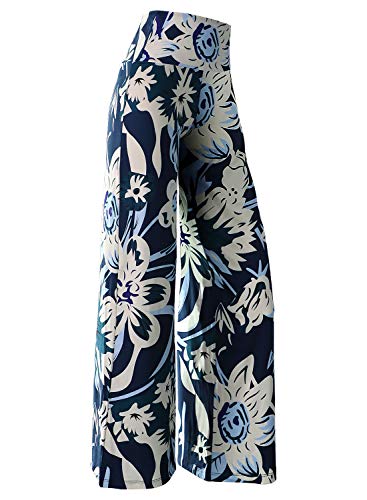
A higher-priced floral palazzo example for considering print placement.
Its retail price and appearance do not reveal matching allowances or yardage.
View on AmazonThese are editorial shopping starting points based on listed details, not hands-on tests. Budget and Premium describe relative asking-price tiers among the featured options when researched; they do not establish product quality. Confirm the selected size, composition and current price on Amazon. How we choose examples.

Write down the pattern name and version, selected size or graded sizes, intended view, adjusted finished length, and fabric width. These are the minimum inputs for a useful estimate. A full-length view and cropped view can share most of their instructions while consuming different amounts of cloth. Wider legs can also change whether pieces fit beside one another.
Use the maker's chart for that combination. For instance, Seamwork's Joss page directs the reader to size and fabric charts for its ankle-cropped design. Its requirements cannot simply be transferred to a different full-length palazzo pattern. If you have not selected a design, use the pattern guide first. A rough shopping estimate can narrow your choices, but it should not become the final cutting plan.
A fabric's advertised width is not necessarily the width available for all garment pieces. Selvedges may need to stay out of the cut parts, and a damaged edge, printing margin, or preparation change can reduce the usable area. Ask the seller how the stated width is measured when the distinction matters. On fabric already owned, measure the actual prepared cloth in several places.
Draw or mark that usable width for your layout. If the pattern layout uses folded fabric, remember that the working area shown may be half the open width. A piece labeled to cut on the fold needs that fold in the correct place; it cannot be treated as a free-standing half piece without creating the full mirrored shape. Keep fabric width and layout width labeled so you do not accidentally compare a folded diagram with an open-width measurement.
Imagine four simplified leg-piece footprints, each 110 cm long: two fronts with a maximum width of 30 cm and two backs with a maximum width of 35 cm. These are hypothetical rectangles used to explain layout arithmetic, not a pattern. Their combined width is 130 cm. Within 140 cm of usable cloth, all four footprints could sit in one row. Within 110 cm, they cannot; at least one must move into another lengthwise row.
| Illustrative layout | Usable width | Leg-piece arrangement | Length occupied by these footprints |
|---|---|---|---|
| Wider cloth | 140 cm | All four across, using 130 cm | 110 cm |
| Narrower cloth | 110 cm | Pieces split across two rows | 220 cm |
| Actual purchase plan | Measured for the chosen cloth | Includes every real piece and required direction | Must be measured from that full layout |
Real pattern shapes may nest more efficiently than rectangles, and pockets or bands need additional space. The example shows why a small width difference can trigger a large length increase. It does not supply a yardage recommendation. Do not assume that a longer cut can rescue cloth narrower than an individual required piece; that problem may require a different fabric or an intentional pattern redesign.
Trace or print the selected size and make your approved fit and length changes before measuring the final layout. Include the prescribed seam and hem allowances. Where a template is used more than once, create enough paper copies to represent the required cut count, or mark its repeated location unambiguously. Two fronts and two backs must account for both sides of the body, not just the two paper templates in the envelope.
Arrange the pieces within a taped rectangle, on a large cutting surface, or in a carefully scaled drawing. Keep grainlines in the permitted direction and respect fold markings. Add the waistband, pocket bags, patch pockets, belt loops, ties, facings, and any other pieces cut from the main fabric. Small pieces can occupy gaps only if they truly fit there with the correct direction. Measure the longest occupied span after the entire layout is complete.
Use the pattern's lengthen-or-shorten lines when appropriate, then smooth the affected outlines. Adding length at the hem of a shaped leg is not always equivalent to changing it through the body of the pattern. Similarly, shortening a pattern may change how pieces nest across the width. For substantial changes, recheck the finished shape and the layout rather than subtracting a single number from the printed yardage.
Suppose two successive rows of leg pieces each become 6 cm longer after adjustment. A layout that keeps those rows separate can need 12 cm more length, before any other rearrangement. If all relevant pieces occupy one row, the same adjustment might increase its span by only 6 cm. Those are layout consequences, not general sizing formulas. Count how many lengthwise rows are affected, and use your revised pieces to confirm the result.
Some fabrics have motifs that must face one way; some surfaces look different when reversed. Follow the supplier's nap or direction advice and inspect a sample in the intended lighting. A non-directional layout may turn pieces end for end to save space. That arrangement is unsuitable when it produces upside-down flowers or visibly different shading between legs.
Print matching adds another decision. Identify which joins and visible areas actually need matching, then place their sewing lines against the repeat. A repeat measurement is useful, but adding exactly one repeat is not a universal solution: multiple panels, large motifs, or a centered placement can consume more. A border print may also constrain the hem position and grain orientation. Test that specific layout before ordering, especially if the print is the reason you chose the fabric.
Fabric can change dimensions during preparation, and the change may differ along its length and width. CottonWorks' shrinkage and skewing material explains that dimensional behavior involves the fabric's construction and processing. A fiber name alone does not justify promising a particular shrinkage percentage. Use the supplier's guidance and the treatment appropriate for the cloth you plan to buy.
A representative test can help when a sample is available. Mark and measure a known rectangle, prepare it by the permitted method you intend to use, let it settle, and measure again. Record both directions and the exact treatment. A small sample is evidence for planning, not a guarantee that every part of a larger cut will behave identically. Crucially, a loss of width can invalidate the entire layout even if you purchased enough extra length.
Here is a separate hypothetical calculation. A complete layout, already checked at the expected prepared usable width, occupies 260 cm. You choose another 10 cm for squaring the ends and the practical handling needs of this particular cut, making the desired prepared length 270 cm. A representative lengthwise test changes from 50 cm to 48 cm, a measured reduction of 4 percent. That percentage belongs only to this example.
To estimate the length before that reduction, divide 270 by 0.96. The result is 281.25 cm, or 2.8125 m. If the retailer cuts in 10 cm increments, round up to at least 2.9 m; if it sells only whole meters, the purchase would be 3 m. Do not merely add 4 percent to the needed final length and assume the calculation is exact. The starting length must retain the required amount after the estimated loss.
Keep all layout measurements in one unit until the arrangement is settled. One yard is exactly 91.44 cm, and one meter is 100 cm. Divide a centimeter total by 91.44 to obtain yards, or by 100 to obtain meters. Then round upward to the seller's available increment. A shop selling quarter yards and one selling tenth meters can produce different purchase quantities from the same underlying requirement.
Record the unrounded result as well as the amount ordered. This makes it easier to understand the leftover fabric later. Be especially careful with decimal yards: 2.5 yards means two and a half yards, not two yards and five inches. If a product page gives both imperial and metric chart values, use one complete column consistently rather than mixing rounded entries from the two systems.
Lining, interfacing, pocketing, and elastic do not automatically use the same quantity as the outer fabric. Each has its own pieces, usable width, direction rules, and purchase increment. A lining can be shorter or constructed differently, while interfacing may reinforce only selected areas. Follow the chosen pattern's separate requirements and make an independent layout whenever the chart does not cover your changes.
For a remnant, inspect the whole usable area before celebrating the stated length. A central flaw or uneven end can sit exactly where a long leg panel needs to go. Lay out every required piece and reserve any matching area before cutting the first one. If the layout fails, compare another pattern or a deliberately shorter view through the appropriate guide; do not quietly remove essential seam or hem allowances to make it fit.
The Lepunuo geometric-print long palazzo listing can help you think about whether a visible print is central to the project. The TARSE high-waist pleated linen-palazzo listing with pockets highlights a different set of design decisions: pleats and pocket pieces must be represented in a sewing layout when the chosen pattern includes them. Neither listing reveals the manufacturer's cutting marker or usable fabric width.
The higher-priced Lands' End floral linen-palazzo listing is another optional comparison for a printed finished garment. These examples are not supplies you need to buy. Once the yardage is settled, move to the beginner sewing sequence with a written plan: pattern version, prepared usable width, complete layout length, preparation assumption, and final order quantity. That short record is far more reusable than remembering that one previous pair took a certain number of yards.
It may be enough for some combinations and insufficient for others. Size, leg width, garment length, fabric width, and direction all matter. Check the exact pattern chart and a complete adjusted layout before purchasing.
It can save length when additional pieces fit beside one another, but it does not always change the arrangement. The actual shapes and grainlines determine whether the extra width is useful.
Do not treat ten percent, or any other percentage, as universal. Use the fabric supplier’s advice or a representative preparation test, and account for possible width loss as well as length loss.
Only if the pattern chart or an actual layout supports it. A larger piece may cross a width threshold and force a second row, so a small size change can have a larger effect on required length.
Order fabric from a complete plan, not a silhouette-wide yardage rule. Begin with the chart for your exact pattern, size, and view, then incorporate length adjustments and the cloth's usable width. Place every required piece in its permitted direction, including pockets and waist details, before measuring the occupied length. Print matching and preparation losses need their own evidence and calculations. Convert the final requirement into the shop's units and round up to its cutting increment. Keep that calculation with the pattern so you can explain both shortages and leftovers. A measured layout makes the purchase decision clearer and protects the construction choices you actually want.