Best Overall

Tronjori High-waist business palazzo pants
A Short-size ready-made example to investigate before deciding on a length alteration.
Not a sewing supply; exact hem construction is unverified.
View on AmazonAlterations
The difficult part of hemming palazzo pants is rarely sewing a circle. It is keeping a broad, moving edge level without making it stiff, stretched, or unexpectedly short. The amount of fabric around each leg means a small handling mistake can repeat over a long distance.
Begin with a pair whose waist and rise already fit, and decide which shoes the finished hem will serve. This guide covers permanent sewn hems. If you need a reversible adjustment for one outing, use the separate no-sew guide before cutting anything.
As an Amazon Associate I earn from qualifying purchases. Purchases take place on Amazon.
Best Overall
A Short-size ready-made example to investigate before deciding on a length alteration.
Not a sewing supply; exact hem construction is unverified.
View on AmazonBest Budget
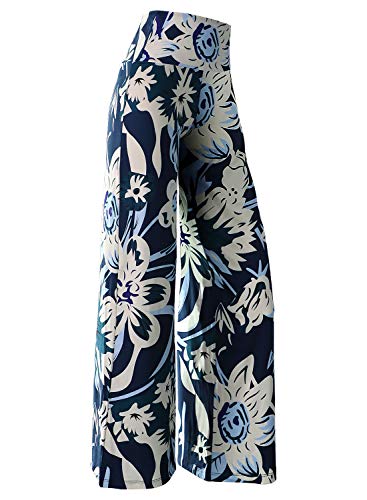
Lower-priced flowing-palazzo example for considering alteration cost against replacement.
No claim that its fabric is easy to hem.
View on AmazonBest Premium

Higher-priced formal wide-leg example that highlights the need to inspect chiffon construction.
Adjacent dress pants; specialist handling may be needed after actual inspection.
View on AmazonThese are editorial shopping starting points based on listed details, not hands-on tests. Budget and Premium describe relative asking-price tiers among the featured options when researched; they do not establish product quality. Confirm the selected size, composition and current price on Amazon. How we choose examples.
Turn one leg inside out and examine how the edge is finished. A narrow double fold, overlocked edge with a single turn, blind hem, and coverstitched knit hem behave differently. Photograph the original before unpicking it. Note any lining, slit, cuff, trim, or permanently pressed detail that would be affected by shortening.
Check the upper fit too. If the waistband slips or the rise is uncomfortable, a new hem will be marked against an unstable position. Resolve those issues first. Remove only enough of the old stitches to understand the construction; avoid pulling hard on a long thread that could damage fine fabric. If an old fold or needle line remains visible after label-compatible pressing, decide whether the new hem will hide it. An alteration can change length without erasing every trace of the previous finish.
If the pants are yours to alter, care for them according to their label before establishing the final length, especially if you have not yet seen how they behave after cleaning. Do not wash a garment against its instructions merely to “preshrink” it. GINETEX explains that care guidance concerns the whole article, including components and finishes. That applies to pressing decisions as well as cleaning.
Use a large enough table to support the leg rather than leaving most of its weight hanging off an edge. Gather suitable thread, a fresh needle appropriate to the fabric, a ruler or hem gauge, removable marking tools, scissors, and pins or clips. Test the marker in a hidden place. A small successful test matters more than a product's general claim that it washes out of fabric.
Put on the trousers and intended shoes, settle the waistband, and stand normally. A helper can mark the desired fold around each leg while you keep your posture relaxed. Do not bend over repeatedly to inspect your own hem; doing so changes where the fabric hangs. The length guide covers choosing clearance for footwear and walking.
Mark more than the inseam and side seam. Broad legs need intermediate reference points so the edge does not dip between them. Check both legs individually rather than assuming your body, the garment, and the original hems are perfectly symmetrical. If the fabric hangs unevenly, allow it to settle and recheck before cutting. A pronounced unevenness may come from grain, construction, or upper fit; trimming it immediately can hide the symptom while creating another problem.
| Garment situation | Finish to consider | Reason to test carefully |
|---|---|---|
| Stable everyday woven | Narrow double-fold machine hem | Thickness and visible stitching |
| Woven dress trousers | Finished raw edge and hand or machine blind hem | Stitches showing on the outside |
| Very light sheer fabric | Fine narrow or rolled hem | Puckering, feeding, and loss of drape |
| Stretch knit | Stretch-compatible sewn hem | Waviness or stitches breaking during stretch |
| Lined or layered trousers | Separate compatible hems | Outer and inner layers catching each other |
These are choices to sample, not interchangeable recipes. Tilly and the Buttons' Marigold tutorial demonstrates a finished raw edge turned and sewn for that specific trouser pattern. Its hem depth belongs to that project, not every palazzo fabric. Preserve the visual weight of your own garment when choosing an allowance.
The finished length is the fold at the bottom of the pants. The cutting line sits below it by the amount needed for your chosen hem. Confusing those two lines is how a correct fitting becomes an irreversible short pair. Mark them in different ways and measure the allowance at several points before using the scissors.
For example, if your tested finish needs two turns of equal depth, retain enough fabric for both turns beneath the finished fold. If it uses an overlocked edge and one turn, retain that planned turn depth instead. Use your actual sample dimensions; there is no universal palazzo allowance. When a leg widens toward the hem, the turned-up edge may be wider than the area it must join. A narrower finish can reduce that mismatch. Do not force excess circumference flat with heavy pressing.
Test the intended finish on spare matching material if available. Mark and baste the proposed fold, then approve the length during a worn try-on before cutting. Only then trim confirmed surplus while keeping the full tested allowance. Material outside that retained allowance can supply a final stitch sample after the length is approved. A concealed area can show needle and heat behavior, but do not damage a needed seam allowance for practice. Test the full number of layers your chosen hem will contain, not a single scrap thickness.
Look for skipped stitches, puckering, tunneling, stretched edges, and a hard ridge. Press the sample only as the fabric permits, then let it cool before judging it. Adjust one setting at a time. A special foot can help with a particular technique, but it does not eliminate the need to guide the fabric steadily. If you cannot obtain a clean sample on a delicate material, stop before repeating the problem around two very wide legs.
After marking the allowance, fold and secure the hem with hand basting or an appropriate temporary stitch. Keep the original side and inseam lines aligned; twisting the fold to make one point meet another can distort the leg. Support the fabric flat while working around the circumference, and avoid stretching it into place.
Try the trousers on again with the same shoes. Walk forward and backward, turn, and check the back edge near the heel. Look at the hem from a distance as well as close up. If the two legs differ, compare the actual marks and waistband position before assuming the sewing is at fault. This fitting is the moment to correct length or fullness. Only after it works should you trim any remaining excess that the chosen finish does not need.
Work with the bulk supported so the machine is feeding the edge rather than resisting the weight of the whole garment. Follow the tested stitch line and keep the fold consistent. At seam intersections, slow down and maintain control rather than tugging the material through. Remove pins before they reach the needle.
For a hand-finished woven hem, catch only the amount of outer fabric needed for a discreet hold and avoid drawing the thread tight enough to create dimples. For a knit, use the stretch-compatible method established on your sample; an ordinary rigid stitch may not accommodate the movement you expect. The Therm O Web knit-hem demonstration illustrates using a specific stabilizing tape before sewing. Such aids must suit the fabric and their own instructions; they are not mandatory.
If the pants have an independent lining, examine how much shorter it originally sat and how it moved beneath the outer fabric. Preserve sufficient separation so it does not emerge or pull the outer hem upward. Do not sew a free lining into the outer hem simply to finish faster. It changes how the layers move and may create tension.
Permanent pleats, border prints, scalloped edges, and multiple hanging panels can make shortening much more involved. A new hem may remove the design feature or require specialist pressing. If a garment is valuable to you, ask a tailor to assess it before unpicking. The Alex Evenings chiffon dress-pant listing is an example of an adjacent formal wide-leg style where exact layer construction deserves inspection. The title alone cannot tell you how its hem should be altered.
Press the completed hem according to the label and your successful test. Lift and reposition the iron rather than dragging fabric out of shape. Let the garment cool in its natural position, remove basting and marks appropriately, and inspect the outside for visible stitches or ridges. Check the finished length once more after the fabric relaxes.
If you are considering a replacement instead of altering, the Tronjori M Short business-palazzo listing is a reminder to investigate an existing shorter option. A simple Arolina flowing palazzo listing provides another ready-made comparison, but neither title establishes hemming difficulty. These examples are optional; you need no new trousers to complete the method. Save the original hem depth, final length, and shoe choice in your notes so a future repair or matching pair is easier to discuss.
Mark and check both individually first. Stacking slippery layers can shift them, and the required finished lengths may differ. A controlled cut along verified lines is more useful than speed.
Possible causes include stretched fabric, feeding problems, or a finish that does not suit the material. Revisit your sample and handling before pressing harder. More heat is not a universal correction.
Usually an independent lining needs to remain concealed and move freely, but preserve the garment’s intended construction. Inspect the original relationship rather than assigning one fixed difference to every pair.
A successful sewn palazzo hem starts before the needle moves: establish a stable upper fit, mark with the intended shoes, and choose a finish that preserves the fabric's movement. Separate the finished fold from the cutting line and keep the required allowance. A realistic sample and a basted try-on prevent many irreversible mistakes. During sewing, support the generous leg fabric and avoid stretching it through the machine. Treat linings, permanent pleats, and decorative edges as distinct construction problems. If those details exceed your current skills, a tailor can assess them while the original material is still available to work with.